When working with Svelte or Sveltekit, optimizing your development environment in VSCode can significantly boost your productivity.
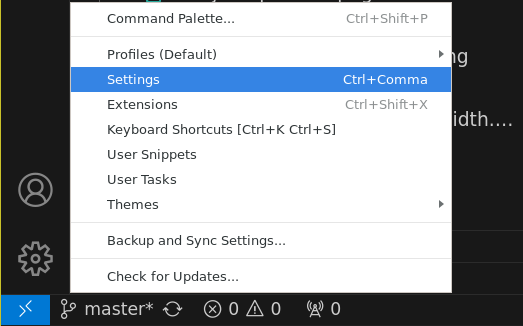
The image shows how to get to the settings in VSCode. You can also use Ctrl+comma shortcut to get here.
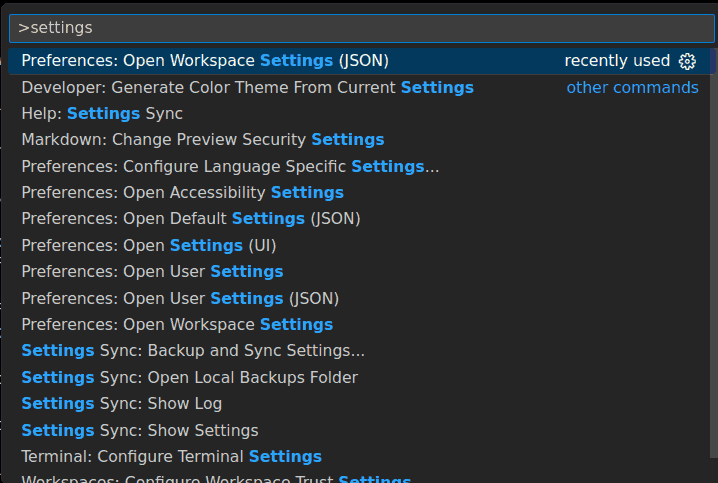
Also, you can edit these settings through a JSON file as well. This is how you open the JSON file. Press Ctrl+Shift+p and then type settings. You should see the options with (JSON) at the end of their name.
1. Filefirst Sort Order
My projects were usually small and I never noticed this issue but gradually when these projects grew, it became a little hard to find files in sub-directories.
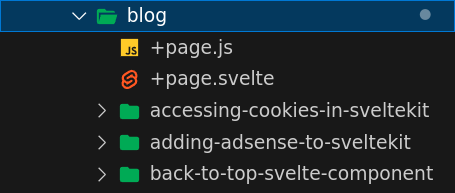
One of the key aspects of managing a growing project is organizing your files and directories effectively. In VSCode, navigate to Settings >> Explorer: Sort Order >> filesFirst. This setting ensures that files are displayed before directories.
Particularly beneficial for larger projects with numerous sub-directories, this arrangement makes it easier to locate essential files like +page.svelte, +layout.svelte, +server.js, or +error.svelte directly beneath their respective directories.
You can also use this JSON for the same
{
  "explorer.sortOrder": "filesFirst"
}
2. Custom Label Format
Since all pages in Sveltekit are named +page.svelte there should be a way in the tab to know which directory it belongs to.
In order to see the routes instead, you can customize this in the latest VS Code app using Custom Labels.
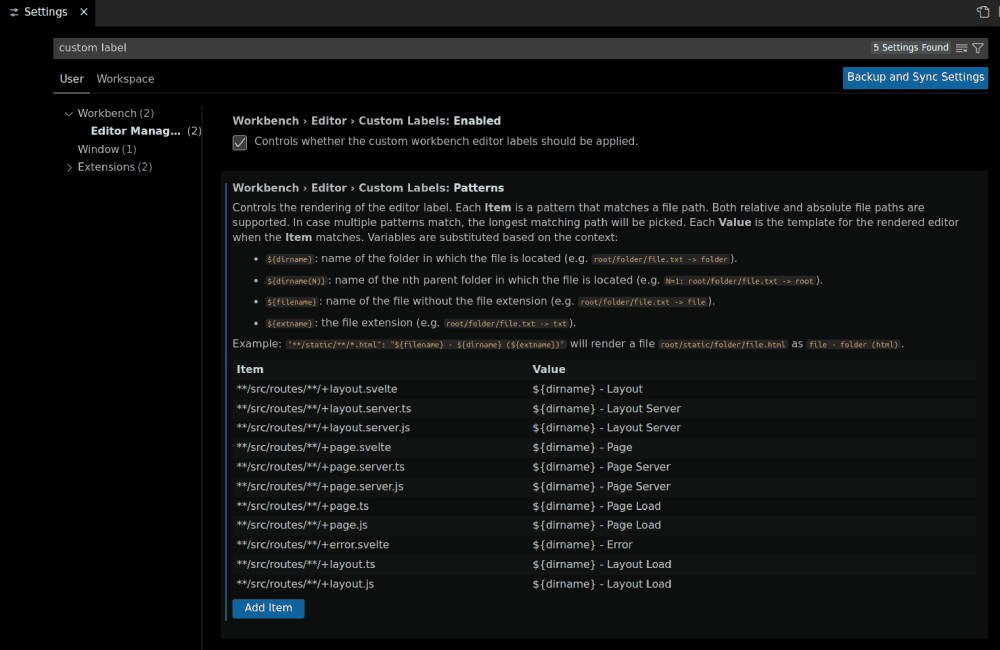
You can also use this JSON for the same.
{
  "workbench.editor.customLabels.patterns": {
    "**/src/routes/**/+layout.svelte": "${dirname} - Layout",
    "**/src/routes/**/+layout.server.ts": "${dirname} - Layout Server",
    "**/src/routes/**/+layout.server.js": "${dirname} - Layout Server",
    "**/src/routes/**/+page.svelte": "${dirname} - Page",
    "**/src/routes/**/+page.server.ts": "${dirname} - Page Server",
    "**/src/routes/**/+page.server.js": "${dirname} - Page Server",
    "**/src/routes/**/+page.ts": "${dirname} - Page Load",
    "**/src/routes/**/+page.js": "${dirname} - Page Load",
    "**/src/routes/**/+error.svelte": "${dirname} - Error",
    "**/src/routes/**/+layout.ts": "${dirname} - Layout Load",
    "**/src/routes/**/+layout.js": "${dirname} - Layout Load"
  }
}
Here is how it looks after applying these settings.

2.1 Medium/Long Label Format
If you don’t like the above method then you can use this one instead.
To show the page directory, modify the tab label format to Medium. In VSCode, navigate to Settings >> Label Format >> Medium. This provides a clear indication of the directory to which each +page.svelte file belongs, enhancing overall project visibility.

You can also use Short instead of Medium. It shows the route of the page.
You can also use this JSON for the same.
{
  "workbench.editor.labelFormat": "short"
}
3. Tree Indentation
Optimize the readability of your file structure by adjusting tree indentation.
Navigate to Settings >> Workbench >> Tree: Indent >> 12. A larger indent value enhances clarity, making it easier to identify file associations with specific directories.
Additionally, ensure that compact folders are disabled, ensuring directories are clearly distinguished even if they contain no files. You can disable it here Settings >> Explorer: Compact Folders >> (uncheck)

You can also use this JSON for the same.
{
  "workbench.tree.indent": 16
}
4. Sveltekit Generate Files
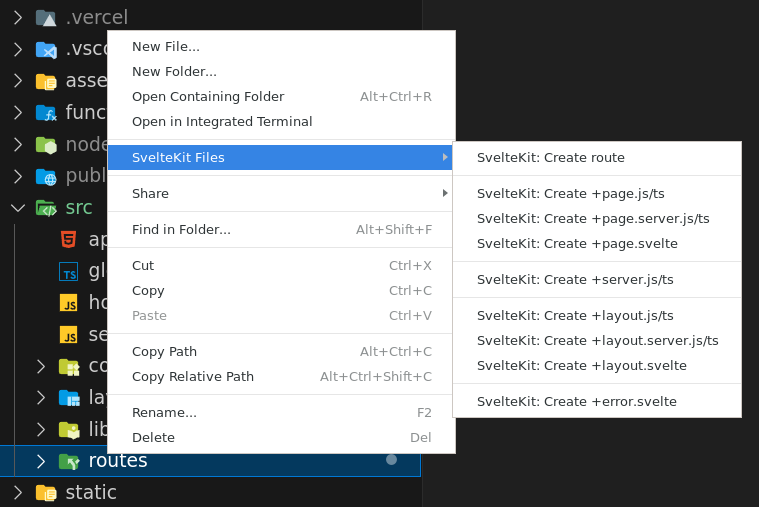
Creating routes in Sveltekit involves repetitive tasks. Streamline this process by utilizing this Sveltekit extension, providing valuable Svelte language support.

The most useful feature in this extension is not enabled by default. I’m not sure why.
To activate this feature, access the extension settings and enable the context menu.

With this enhancement, generating essential Sveltekit files becomes a seamless process, saving you valuable time and effort.
5. Search for Files with ’+`
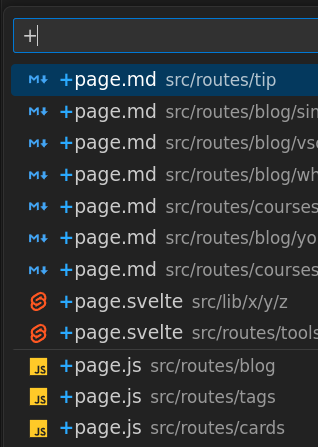
A handy trick, suggested by Svelte’s creator Rich Harris, involves quickly locating pages, layouts, and endpoints. Simply press Ctrl+p and enter + in the search bar.
This method efficiently filters Sveltekit-related files, allowing you to swiftly access specific components within your project.
These optimized settings and extensions are tailored to enhance your Svelte development experience in VSCode. By implementing these improvements, you can navigate your projects with ease, boost your efficiency, and focus on building exceptional web applications with Svelte.
Thank you. Happy coding!